This is the multi-page printable view of this section. Click here to print.
Internet of Things (IoT)
- 1: Introduction to IoT
- 2: IoT Hardware Platforms
- 2.1: Arduino
- 2.2: Raspberry Pi
- 2.2.1: Cutsom
- 2.2.2: Cutsom install Kali Linux
- 2.3: Jetson Nano
- 2.3.1: Advanced Online Radio Listening on Ubuntu
- 2.3.2: Introduction to Docker for Beginners
- 2.3.3: Setting Up Your Own Radio Station on Ubuntu with Icecast and Jetson Nano
- 2.3.4: Nvidia Jetson Nano | Arch Linux
- 2.3.5: Basic Network Intrusion Detection System using Python and Scapy on Nvidia Jetson Nano with Ubuntu
- 2.3.6: Basic Password Cracker with Nvidia Jetson Nano on Ubuntu
- 2.3.7: Basic Port Scanner with Nvidia Jetson Nano on Ubuntu
- 2.3.8: Begin
- 2.3.9: My Custom Nvidia Jeson Nano AI project
- 2.3.10: Embark on a Machine Learning Odyssey with Nvidia Jetson Nano and Ubuntu
- 2.3.11: Experimenting with Steganography on Nvidia Jetson Nano using Ubuntu
- 2.3.12: Explore a World of Innovation with Nvidia Jetson Nano Projects
- 2.3.13: Getting Started with Jetson Nano Developer Kit
- 2.3.14: new2
- 2.3.15: Upgrade OpenCV to Version 4.6 on Nvidia Jetson Nano
- 2.3.16: Nvidia Jetson Nano Post-Installation Guide
- 2.3.17: Reverse Engineering an Executable File on Nvidia Jetson Nano using IDA Pro
- 2.3.18: How To Set Up SSD on Nvidia Jetson Nano
- 2.3.19: Building a Simple Web Crawler on Nvidia Jetson Nano using Ubuntu
- 2.3.20: Simple Wi-Fi Sniffer with Nvidia Jetson Nano on Ubuntu
- 2.3.21: TensorFlow 2.4 Installation on Nvidia Jetson Nano
- 2.3.22: Upgrade Python to Version 3.7 on Ubuntu
- 2.3.23: Xbox 360 v1 Camera
- 3: IoT Software Platforms
- 4: IoT Protocols and Standards
- 5: IoT Programming
- 6: IoT Security
- 7: IoT Connectivity and Networks
- 8: IoT Data Management
- 9: IoT Edge Computing
- 10: IoT Industry Applications
1 - Introduction to IoT
What is IoT? IoT architectures and components IoT applications and use cases
2 - IoT Hardware Platforms
Arduino: arduino Arduino for IoT Arduino IoT projects Raspberry Pi: raspberrypi Raspberry Pi for IoT Raspberry Pi IoT projects Jetson Nano: jetson Jetson Nano for IoT Jetson Nano IoT projects Other hardware platforms (ESP32, STM32, etc.)
2.1 - Arduino
Arduino for IoT Arduino IoT projects
2.2 - Raspberry Pi
2.2.1 - Cutsom
2.2.2 - Cutsom install Kali Linux
Raspberry Pi 4 4GB
Download:
2.3 - Jetson Nano
Jetson Nano for IoT Jetson Nano IoT projects
2.3.1 - Advanced Online Radio Listening on Ubuntu
Option 1: Using mpv
Install mpv with Advanced Configuration
Ensure you have mpv installed with advanced audio options:
sudo apt-get install mpv
Configure advanced audio settings for optimal streaming:
echo "ao=alsa" >> ~/.config/mpv/mpv.conf
Listen to a Dutch Radio Station with Quality Settings
Replace the URL with the streaming URL of the desired radio station. For example, to listen to NPO Radio 1 (Dutch) with high-quality settings:
mpv --no-cache --untimed http://icecast.omroep.nl/radio1-bb-mp3
Option 2: Using radiotray
Install radiotray with Custom Stations
sudo apt-get install radiotray
Create a custom station list for Radiotray:
echo "NPO Radio 1 | http://icecast.omroep.nl/radio1-bb-mp3" >> ~/.config/radiotray/bookmarks.xml
Open Radiotray and enjoy your custom station list.
Option 3: Using radio-browser-cli
Install radio-browser-cli with Advanced Search
sudo apt-get install radio-browser-cli
Search for stations by country, genre, and bitrate:
radiobrowser -c Netherlands -g Pop -b 128
Explore advanced search options to discover stations tailored to your preferences.
Conclusion
Congratulations! You’ve delved into advanced settings for listening to online radio on your Ubuntu machine. Tailor your experience, whether it’s adjusting audio configurations, creating custom station lists, or exploring radio stations with specific criteria. Enjoy the diverse world of online radio with these advanced tools.
2.3.2 - Introduction to Docker for Beginners
Prerequisites
Before you begin, ensure that you have Docker installed on your machine. Follow the official Docker installation guide for your operating system.
Understanding Containers and Images
What are Containers?
A container is a lightweight, standalone, and executable software package that includes everything needed to run a piece of software, including the code, runtime, libraries, and system tools.
What are Images?
An image is a lightweight, standalone, and executable software package that includes everything needed to run a container. It serves as the blueprint for containers.
Basic Docker Commands
1. Verify Docker Installation
To ensure Docker is installed, run:
docker --version
2. Run Your First Container
Run a simple container:
docker run hello-world
3. List Running Containers
View the containers that are currently running:
docker ps
4. Explore Docker Images
List the Docker images on your machine:
docker images
Building and Running Custom Containers
1. Create a Dockerfile
Create a file named Dockerfile in your project directory:
# Use an official Ubuntu runtime as a parent image
FROM ubuntu:20.04

# Set the working directory
WORKDIR /app

# Copy the current directory contents into the container at /app
COPY . /app

# Install any needed packages specified in requirements.txt
RUN apt-get update && apt-get install -y python3

# Make port 80 available to the world outside this container
EXPOSE 80

# Define environment variable
ENV NAME World

# Run app.py when the container launches
CMD ["python3", "app.py"]
2. Build the Docker Image
Build the Docker image using the Dockerfile:
docker build -t my-python-app .
3. Run the Custom Container
Run the container from the built image:
docker run -p 4000:80 my-python-app
Visit http://localhost:4000 to see your Python application running in a Docker container.
Conclusion
Congratulations! You’ve taken your first steps into the world of Docker. This tutorial covered the basics of containers, images, and running custom applications in Docker containers. Dive deeper into Docker’s features and explore its vast ecosystem for more advanced use cases.
2.3.3 - Setting Up Your Own Radio Station on Ubuntu with Icecast and Jetson Nano
Introduction
In this tutorial, we’ll guide you through the process of setting up your own radio station using Icecast on an Ubuntu machine, specifically on a Jetson Nano. Icecast is a popular streaming server that allows you to broadcast audio content over the internet.
Prerequisites
- Ubuntu machine (Jetson Nano, in this case)
- Internet connection
Step 1: Install Icecast Server
Open a terminal and run the following commands:
sudo apt-get update
sudo apt-get install icecast2
During the installation, you will be prompted to set a password for the admin user.
Step 2: Configure Icecast
Edit the Icecast configuration file with your preferred text editor:
sudo nano /etc/icecast2/icecast.xml
Update the file with your server details, including the server name, port, and passwords.
Step 3: Start Icecast
Start the Icecast server with the following command:
sudo service icecast2 start
Step 4: Set Up a Source Client (Darkice)
Install the Darkice source client:
sudo apt-get install darkice
Configure Darkice by editing its configuration file:
sudo nano /etc/darkice.cfg
Provide the necessary settings, such as server, port, and source password.
Step 5: Start Darkice
Start the Darkice source client:
darkice
Step 6: Broadcast Your Audio
Use ffmpeg to convert your audio source and send it to the Icecast server. Adjust the parameters accordingly:
ffmpeg -f pulse -i default -acodec libmp3lame -ab 128k -ar 44100 -content_type audio/mpeg -ice_name "Your Radio Station" -ice_description "Description of your station" -ice_genre "Your preferred genre" -ice_url "http://yourstreamurl" -ice_public 1 -ice_server "localhost:8000" -ice_mount "/yourmountpoint" -ice_user "source" -ice_pass "yoursourcepassword" http://localhost:8000/yourmountpoint
Step 7: Listen to Your Radio Station
Open a media player (e.g., VLC) and connect to your Icecast stream using the URL: http://localhost:8000/yourmountpoint.
Congratulations! You’ve successfully set up your own radio station using Icecast on your Ubuntu machine.
Feel free to customize the configuration based on your preferences and share your streaming URL with others.
2.3.4 - Nvidia Jetson Nano | Arch Linux
General info
Here are the steps to build your own updated version of Arch Nano. Arch Linux for Nvidia Jetson Nano 2GB and 4GB. If you encounter any problem with creation because i made a mistake some where just let me know so i can update this and make it better and everyone can enjoy a happy Arch Nano Project.
It will work on
- Jetson Nano (2GB)
- Jetson Nano (4GB)
We need for this project:
- Jetson Nano
- Micro SD Card
- Micro USB Cable
- balenaEtcher
- 1 jumper (for recovery mode)
Basic Knowledge:
- How to save with
nano:CTRL+XthenYthenENTER
Build it yourself (Debian/Ubuntu)
So before we begin i use a Linux based operating system with apt but for those who like apt-get can use that.
it’s all up to you.
I love housekeeping so let’s start with:
$ sudo apt update
$ sudo apt upgrade -y
$ sudo apt autoremove -y
$ sudo apt autoclean
Before we begin we need some tools so let’s download them
$ sudo apt install curl wget git nano
$ sudo apt install qemu-user-static
Create a Folder for this project
$ mkdir ProjectFolder
$ cd ProjectFolder
Download the Nvidia Jetson Nano L4T Driver Package (BSP) and extract
$ wget https://developer.nvidia.com/embedded/l4t/r32_release_v5.1/r32_release_v5.1/t210/jetson-210_linux_r32.5.1_aarch64.tbz2
$ sudo tar jxpf jetson-210_linux_r32.5.1_aarch64.tbz2
$ sudo rm -r jetson-210_linux_r32.5.1_aarch64.tbz2
$ cd Linux_for_Tegra
Download Arch Linux aarch64 and extract
$ cd rootfs
$ wget http://os.archlinuxarm.org/os/ArchLinuxARM-aarch64-latest.tar.gz
$ sudo tar -xpf ArchLinuxARM-aarch64-latest.tar.gz
$ sudo rm -r ArchLinuxARM-aarch64-latest.tar.gz
Now we need to add some lines to the nv_customize_rootfs.sh file
$ cd ../nv_tools/scripts/
$ nano nv_customize_rootfs.sh
Find
    if [ -d "${LDK_ROOTFS_DIR}/usr/lib/arm-linux-gnueabihf/tegra" ]; then
        ARM_ABI_DIR_ABS="usr/lib/arm-linux-gnueabihf"
    elif [ -d "${LDK_ROOTFS_DIR}/usr/lib/arm-linux-gnueabi/tegra" ]; then
        ARM_ABI_DIR_ABS="usr/lib/arm-linux-gnueabi"
    elif [ -d "${LDK_ROOTFS_DIR}/usr/lib/aarch64-linux-gnu/tegra" ]; then
        ARM_ABI_DIR_ABS="usr/lib/aarch64-linux-gnu"
    else
        echo "Error: None of Hardfp/Softfp Tegra libs found"
        exit 4
    fi
Replace with:
    if [ -d "${LDK_ROOTFS_DIR}/usr/lib/arm-linux-gnueabihf/tegra" ]; then
        ARM_ABI_DIR_ABS="usr/lib/arm-linux-gnueabihf"
    elif [ -d "${LDK_ROOTFS_DIR}/usr/lib/arm-linux-gnueabi/tegra" ]; then
        ARM_ABI_DIR_ABS="usr/lib/arm-linux-gnueabi"
    elif [ -d "${LDK_ROOTFS_DIR}/usr/lib/aarch64-linux-gnu/tegra" ]; then
        ARM_ABI_DIR_ABS="usr/lib/aarch64-linux-gnu"
    elif [ -d "${LDK_ROOTFS_DIR}/usr/lib/tegra" ]; then
        ARM_ABI_DIR="${LDK_ROOTFS_DIR}/usr/lib"
    else
        echo "Error: None of Hardfp/Softfp Tegra libs found"
        exit 4
    fi
Now save this with the following command because we use nano: CTRL + X then Y and hit enter
Now we need to create some folders
$ cd ../../nv_tegra
$ mkdir nvidia_drivers config nv_tools nv_sample_apps/nvgstapps
After the folders are created we extract .tbz2 and move the folders
$ sudo tar -xpjf nvidia_drivers.tbz2 -C nvidia_drivers/ && sudo rm -r nvidia_drivers.tbz2

$ sudo tar -xpjf config.tbz2 -C config/ && sudo rm -r config.tbz2

$ sudo tar -xpjf nv_tools.tbz2 -C nv_tools/ && sudo rm -r nv_tools.tbz2

$ sudo tar -xpjf nv_sample_apps/nvgstapps.tbz2 -C nv_sample_apps/nvgstapps/ && sudo rm -r nv_sample_apps/nvgstapps.tbz2
$ cd ../nv_tegra/nvidia_drivers
$ sudo mv lib/* usr/lib/
$ sudo rm -r lib
$ sudo mv usr/lib/aarch64-linux-gnu/* usr/lib/
$ sudo rm -r usr/lib/aarch64-linux-gnu
$ sudo nano etc/nv_tegra_release
Find
0c165125388fbd943e7f8b37a272dec7c5d57c15 */usr/lib/aarch64-linux-gnu/tegra/libnvmm.so
Repalce with:
0c165125388fbd943e7f8b37a272dec7c5d57c15 */usr/lib/tegra/libnvmm.so
Now save this with the following command because we use nano: CTRL + X then Y and hit enter
Now go in the folder Linux_for_Tegra/nv_tegra/nvidia_drivers/etc/ld.so.conf.d/
to point to the right directory and add the tegra-egl entry.
The contents of nvidia-tegra.conf
$ sudo nano etc/ld.so.conf.d/nvidia-tegra.conf
It should look like this:
/usr/lib/tegra
/usr/lib/tegra-egl
Changes to nv_tools Package
The tegrastats script should be moved from home/ubuntu into the /usr/bin directory. This removes the dependency on a user called ubuntu.
$ cd ../../../nv_tegra/nv_tools
$ mkdir -p usr/bin
Changes to nvgstapps Package
$ cd ../../nv_tegra/nv_sample_apps/nvgstapps/
$ sudo mv usr/lib/aarch64-linux-gnu/* usr/lib/
$ sudo rm -r usr/lib/aarch64-linux-gnu
Finalizing Configuration Changes
When you have finished making all the listed changes, repackage the files:
$ cd ../../../nv_tegra/nvidia_drivers
$ sudo tar -cpjf ../nvidia_drivers.tbz2 *

$ cd ../config
$ sudo tar -cpjf ../config.tbz2 *

$ cd ../nv_tools
$ sudo tar -cpjf ../nv_tools.tbz2 *

$ cd ../nv_sample_apps/nvgstapps
$ sudo tar -cpjf ../nvgstapps.tbz2 *
$ cd ../..
Changes to rootfs
The following are changes that will be made to contents in your rootfs directory.
Initialization Script
As Arch Linux uses systemd rather than upstart, the init script will need to be converted into a systemd service. Information on systemd and how to create services can be found on the Arch Linux Wiki page for systemd
To create the systemd service, we will need the service descriptor file, that tells systemd about the service.
Hence need to create a service file as below in
$ cd ../rootfs/usr/lib/systemd/system
Create a file with nano
sudo nano nvidia-tegra.service
Then past this in…
#!/bin/bash

if [ -e /sys/power/state ]; then
    chmod 0666 /sys/power/state
fi

if [ -e /sys/devices/soc0/family ]; then
    SOCFAMILY="`cat /sys/devices/soc0/family`"
fi

if [ "$SOCFAMILY" = "Tegra210" ] &&
    [ -e /sys/devices/system/cpu/cpu0/cpufreq/scaling_min_freq ]; then
    sudo bash -c "echo -n 510000 > /sys/devices/system/cpu/cpu0/cpufreq/scaling_min_freq"
fi

if [ -d /sys/devices/system/cpu/cpuquiet/tegra_cpuquiet ] ; then
    echo 500 > /sys/devices/system/cpu/cpuquiet/tegra_cpuquiet/down_delay
    echo 1 > /sys/devices/system/cpu/cpuquiet/tegra_cpuquiet/enable
elif [ -w /sys/module/cpu_tegra210/parameters/auto_hotplug ] ; then
    echo 1 > /sys/module/cpu_tegra210/parameters/auto_hotplug
fi

if [ -e /sys/module/cpuidle/parameters/power_down_in_idle ] ; then
    echo "Y" > /sys/module/cpuidle/parameters/power_down_in_idle
elif [ -e /sys/module/cpuidle/parameters/lp2_in_idle ] ; then
    echo "Y" > /sys/module/cpuidle/parameters/lp2_in_idle
fi

if [ -e /sys/block/sda0/queue/read_ahead_kb ]; then
   echo 2048 > /sys/block/sda0/queue/read_ahead_kb
fi
if [ -e /sys/block/sda1/queue/read_ahead_kb ]; then
    echo 2048 > /sys/block/sda1/queue/read_ahead_kb
fi

for uartInst in 0 1 2 3
do
    uartNode="/dev/ttyHS$uartInst"
    if [ -e "$uartNode" ]; then
        ln -s /dev/ttyHS$uartInst /dev/ttyTHS$uartInst
    fi
done

machine=`cat /sys/devices/soc0/machine`
if [ "${machine}" = "jetson-nano-devkit" ] ; then
    echo 4 > /sys/class/graphics/fb0/blank
            BoardRevision=`cat /proc/device-tree/chosen/board_info/major_revision`
            if [ "${BoardRevision}" = "A" ] ||
                    [ "${BoardRevision}" = "B" ] ||
                    [ "${BoardRevision}" = "C" ] ||
                    [ "${BoardRevision}" = "D" ]; then
                    echo 0 > /sys/devices/platform/tegra-otg/enable_device
                    echo 1 > /sys/devices/platform/tegra-otg/enable_host
            fi
fi

if [ -e /sys/devices/system/cpu/cpu0/cpufreq/scaling_available_governors ]; then
    read governors < /sys/devices/system/cpu/cpu0/cpufreq/scaling_available_governors
    case $governors in
        *interactive*)
            echo interactive > /sys/devices/system/cpu/cpu0/cpufreq/scaling_governor
            if [ -e /sys/devices/system/cpu/cpufreq/interactive ] ; then
                echo "1224000" >/sys/devices/system/cpu/cpufreq/interactive/hispeed_freq
                echo "95" >/sys/devices/system/cpu/cpufreq/interactive/target_loads
                echo "20000" >/sys/devices/system/cpu/cpufreq/interactive/min_sample_time
            fi
                ;;
        *)
                ;;
    esac
fi

echo "Success! Exiting"
exit 0
Now save this with the following command because we use nano: CTRL + X then Y and hit ENTER
Instructions on how to enable the script are in After First Boot section. If you wish to enable the script before flashing / first boot, create the following symbolic link to enable the service.
cd ../../../../etc/systemd/system/sysinit.target.wants/
ln -s ../../../../usr/lib/systemd/system/nvidia-tegra.service nvidia-tegra.service
This should be executed after apply_binaries, so the nvidia-tegra service is in place.
Pacman Configuration
As we have installed a custom kernel to boot linux on the jetson-nano-devkit, it is necessary to update pacman.conf to ignore updates to the kernel package.
To do so add linux as an ignored package to your <path_to_L4T_rootfs>
cd ../../../../etc/
Open pacman.conf with nano
sudo nano pacman.conf
Search now for
#IgnorePkg =
replace it with:
IgnorePkg=linux
close and save it.
Alternatives Support
Arch Linux does not have a built in application for managing alternative versions of the same package as Debian/Ubuntu does.
It does however support having multiple packages installed at the same time, as long as their names are different.
A script can be created to automate the switching between which of the installed versions is treated as the default. As has been done with java [2].
Flashing Jetson Nano
The steps for flashing the Arch Linux image to the Jetson are no different than flashing the image for Ubuntu.
Run the following commands to apply the configuration, create the image, and flash it to the Jetson
You need to have your Jetson nano in recovery mode with jumpers:

- Jumper need to be in 3 and 4
- Connect your micro USB cable to your jetson nano
- Now connect the USB in your PC/Laptop
Open your terminal en type:
lsusb
You must see NVIDIA Corp. APX plugged in you PC
Now apply the NVIDIA specific configuration, binaries, and the L4T kernel
sudo ./apply_binaries.sh
Create the image from the rootfs directory and flash the image to the Jetson
sudo ./flash.sh jetson-nano-devkit mmcblk0p1
Your device should reboot and prompt you to login. The default login for Arch Linux ARM is root/root.
WORK IN PROGRESS
Extra Info
- L4T VERSION: R32.5.1
2.3.5 - Basic Network Intrusion Detection System using Python and Scapy on Nvidia Jetson Nano with Ubuntu
Requirements
- Nvidia Jetson Nano with Ubuntu installed
- Python 3 (https://www.python.org/downloads/)
- Pip (https://pypi.org/project/pip/)
- Scapy (https://scapy.net/)
Steps
Connect your Jetson Nano to a computer using an SSH or USB connection.
Update the package lists and install the necessary packages for Python, Pip, and Scapy:
sudo apt update
sudo apt install -y python3-pip libpcap0.8-dev build-essential libssl-dev libffi-dev libcairo2-dev libgdk-pixbuf2.0-dev libjpeg8-dev libgif-dev libgtk2.0-dev libatk1.0-dev libcairo2-dev libpango1.0-dev libglib2.0-dev libxt6-dev
sudo -H pip3 install scapy
Create a new Python file called
intrusion_detection.pywithin the/home/user/network_monitoringdirectory on your Jetson Nano:nano /home/user/network_monitoring/intrusion_detection.pyCopy and paste the following code into the
intrusion_detection.pyfile, replacing any existing content:from scapy.all import * import datetime def process_packet(packet): ip_layer = packet.getlayer("IP") tcp_layer = packet.getlayer("TCP") if ip_layer and tcp_layer: ip_src = ip_layer.src ip_dst = ip_layer.dst tcp_sport = tcp_layer.sport tcp_dport = tcp_layer.dport # Check for unauthorized access attempts (e.g., SSH brute-force) if tcp_dport == 22: # SSH port number print(f"[{datetime.datetime.now()}] Unauthorized access attempt detected from {ip_src} to {ip_dst}") # Check for malicious data transfers (e.g., large file transfers) if tcp_dport == 80 or tcp_dport == 443: # HTTP and HTTPS ports data = packet.getlayer("Raw").load if len(data) > 1000: # Arbitrary threshold for detecting large file transfers print(f"[{datetime.datetime.now()}] Malicious data transfer detected from {ip_src} to {ip_dst}") # Start the packet sniffer and process each captured packet using the process_packet function sniff(prn=process_packet, filter="tcp")Save and close the
intrusion_detection.pyfile by pressingCtrl+X, thenY, and finallyEnter.Run the intrusion detection system script by executing the following command in a terminal window on your Jetson Nano:
python3 /home/user/network_monitoring/intrusion_detection.pyThe script will now start capturing network traffic and processing each captured packet using the
process_packetfunction. If any suspicious activity is detected, it will be printed to the console along with a timestamp indicating when the event occurred.To stop the intrusion detection system script, simply press
Ctrl+Cin the terminal window where it is running.
Conclusion
In this tutorial, we covered the steps to create a basic network intrusion detection system using Python and Scapy on your Nvidia Jetson Nano with Ubuntu. By following these steps, you should be able to monitor network traffic for suspicious activity, allowing you to identify potential security threats and respond appropriately.
2.3.6 - Basic Password Cracker with Nvidia Jetson Nano on Ubuntu
Requirements
- Nvidia Jetson Nano with Ubuntu installed
- Python 3.x installed (usually comes pre-installed on most modern distributions)
- A list of passwords to crack (either a plaintext file or a hashed file, depending on the encryption algorithm used)
Steps
- Connect your Jetson Nano to a power source and insert an SD card with Ubuntu installed.
- Power on the device and connect it to a monitor, keyboard, and mouse.
- Open a terminal window by clicking on the top-left corner of the screen and selecting “Terminal”.
- Update the package lists by running the following command:
sudo apt update - Install the
hashcatpassword cracking tool by running the following command:sudo apt install hashcat - Create a new directory to store your password files and cracking scripts by running the following command:
mkdir password_cracker cd password_cracker - Download a list of common passwords from the internet (e.g., this one) and save it to your password_cracker directory.
- Create a new Python script named
password_cracker.pyin your password_cracker directory by running the following command:nano password_cracker.py - Copy and paste the following code into your password_cracker.py file, replacing the placeholders with your own values:
import hashlib
import os

# Define a function to crack a password hash using a list of common passwords
def crack_hash(hash_value):
    # Load the list of common passwords from a plaintext file
    password_list = open("common_passwords.txt").read().splitlines()

    # Loop through each password in the list and compute its hash value using SHA-1 algorithm
    for password in password_list:
        hash_object = hashlib.sha1(password.encode())
        computed_hash_value = hash_object.hexdigest()

        # Compare the computed hash value with the input hash value
        if computed_hash_value == hash_value:
            return password

    # If no matching password is found, return None
    return None

# Define a main function to read the user's input and display the results
def main():
    print("Basic Password Cracker")

    # Read the user's input for the password hash value
    hash_value = input("Enter the hash value of the password to crack: ")

    # Call the crack_hash function to attempt to crack the password hash using SHA-1 algorithm
    cracked_password = crack_hash(hash_value)

    # Display the results of the password cracking attempt
    if cracked_password is not None:
        print("The cracked password is:", cracked_password)
    else:
        print("Unable to crack the password hash.")

# Run the main function
if __name__ == "__main__":
    main()
or
import hashlib
import secrets

def load_password_list(file_path):
    try:
        with open(file_path, "r") as file:
            return file.read().splitlines()
    except FileNotFoundError:
        print("Error: Password file not found.")
        exit()

def crack_hash(hash_value, password_list):
    for password in password_list:
        # Simulate salting by using a random salt
        salt = secrets.token_hex(16)  # 16-byte (32-character) hex salt
        salted_password = salt + password
        hash_object = hashlib.sha256(salted_password.encode())
        computed_hash_value = salt + hash_object.hexdigest()

        # Compare the computed hash value with the input hash value
        if computed_hash_value == hash_value:
            return password

    # If no matching password is found, return None
    return None

def main():
    print("Basic Password Cracker")

    # Read the user's input for the password hash value
    hash_value = input("Enter the hash value of the password to crack: ")

    # Load the list of common passwords from a plaintext file
    password_list = load_password_list("common_passwords.txt")

    # Call the crack_hash function to attempt to crack the password hash
    cracked_password = crack_hash(hash_value, password_list)

    # Display the results of the password cracking attempt
    if cracked_password is not None:
        print("The cracked password is:", cracked_password)
    else:
        print("Unable to crack the password hash.")

# Run the main function
if __name__ == "__main__":
    main()
- Save and exit your password_cracker.py file by pressing
Ctrl+X, thenY, thenEnter. - Run your password_cracker.py script by running the following command:
python3 password_cracker.py - Enter the hash value of a password that you want to crack (e.g., the output of the
hashlib.sha1function when called with a sample password) and pressEnter. - Observe the results of your password cracking attempt, which may include the cracked password if it is found in the list of common passwords.
Conclusion
In this tutorial, we covered the steps to create a basic password cracker using the Nvidia Jetson Nano on Ubuntu. By following these steps, you should be able to use your new tool to test the strength of passwords and potentially identify weak or easily guessable credentials that could be exploited by attackers.
2.3.7 - Basic Port Scanner with Nvidia Jetson Nano on Ubuntu
Requirements
- Nvidia Jetson Nano with Ubuntu installed
- Python 3.x installed (usually comes pre-installed on most modern distributions)
Steps
- Connect your Jetson Nano to a power source and insert an SD card with Ubuntu installed.
- Power on the device and connect it to a monitor, keyboard, and mouse.
- Open a terminal window by clicking on the top-left corner of the screen and selecting “Terminal”.
- Update the package lists by running the following command:
sudo apt update - Install the
nmapnetwork exploration tool by running the following command:sudo apt install nmap - Create a new directory to store your port scanning scripts by running the following command:
mkdir port_scanner cd port_scanner - Create a new Python script named
port_scanner.pyin your port_scanner directory by running the following command:nano port_scanner.py - Copy and paste the following code into your port_scanner.py file, replacing the placeholders with your own values:
import argparse
import socket
import subprocess
import sys

# Define a function to perform a basic TCP port scan on a single IP address
def tcp_port_scan(ip_address, port_start, port_end):
    # Loop through each port in the specified range and attempt to establish a TCP connection
    for port in range(port_start, port_end + 1):
        try:
            # Create a socket object and connect to the target IP address on the current port number
            with socket.create_connection((ip_address, port), timeout=5) as sock:
                print(f"Port {port} is open.")

        except (socket.timeout, ConnectionRefusedError):
            # If the connection attempt fails, it may be because the target IP address is not reachable or the port is closed
            pass

# Define a function to parse command-line arguments and perform a basic TCP port scan on a range of IP addresses
def main():
    parser = argparse.ArgumentParser(description="Basic Port Scanner")
    parser.add_argument("start_ip", type=str, help="The starting IP address to scan (e.g., 192.168.0.1)")
    parser.add_argument("end_ip", type=str, help="The ending IP address to scan (e.g., 192.168.0.255)")
    parser.add_argument("--ports", type=int, nargs="+", default=[22, 80, 443], help="The list of ports to scan (default: [22, 80, 443])")

    args = parser.parse_args()

    # Loop through each IP address in the specified range and perform a basic TCP port scan on it
    for ip_address in range(int(args.start_ip.split(".")[0]), int(args.end_ip.split(".")[0]) + 1):
        for ip_part in args.start_ip.split(".")[1:]:
            if ip_part == "":
                ip_part = "0"

            ip_address = f"{ip_address}.{ip_part}"

            # Perform a basic TCP port scan on the current IP address using the specified list of ports
            tcp_port_scan(ip_address, args.ports[0], args.ports[-1])

# Run the main function
if __name__ == "__main__":
    main()
or
import argparse
import socket
import threading

# Define a function to perform a basic TCP port scan on a single IP address
def tcp_port_scan(ip_address, port):
    try:
        # Create a socket object and connect to the target IP address on the specified port number
        with socket.create_connection((ip_address, port), timeout=5) as sock:
            print(f"Port {port} is open on {ip_address}.")

    except (socket.timeout, ConnectionRefusedError):
        # If the connection attempt fails, it may be because the target IP address is not reachable or the port is closed
        pass

# Define a function to scan a range of ports for a single IP address
def scan_ports(ip_address, ports):
    for port in ports:
        tcp_port_scan(ip_address, port)

# Define a function to perform a basic TCP port scan on a range of IP addresses
def main():
    parser = argparse.ArgumentParser(description="Basic Port Scanner")
    parser.add_argument("start_ip", type=str, help="The starting IP address to scan (e.g., 192.168.0.1)")
    parser.add_argument("end_ip", type=str, help="The ending IP address to scan (e.g., 192.168.0.255)")
    parser.add_argument("--ports", type=int, nargs="+", default=[22, 80, 443], help="The list of ports to scan (default: [22, 80, 443])")

    args = parser.parse_args()

    # Loop through each IP address in the specified range and perform a basic TCP port scan on it
    for ip_address in range(int(args.start_ip.split(".")[0]), int(args.end_ip.split(".")[0]) + 1):
        for ip_part in args.start_ip.split(".")[1:]:
            if ip_part == "":
                ip_part = "0"

            ip_address = f"{ip_address}.{ip_part}"

            # Perform a basic TCP port scan on the current IP address using threading
            threading.Thread(target=scan_ports, args=(ip_address, args.ports)).start()

# Run the main function
if __name__ == "__main__":
    try:
        main()
    except KeyboardInterrupt:
        print("\nPort scanning interrupted. Exiting.")
        sys.exit(0)
Save and exit your port_scanner.py file by pressing
Ctrl+X, thenY, thenEnter.Run your port_scanner.py script by running the following command:
python3 port_scanner.py 192.168.1.1 192.168.1.255 --ports 22 80 443This will scan for open ports on all IP addresses in the range from
192.168.1.1to192.168.1.255, using a list of default ports such as SSH (port 22), HTTP (port 80), and HTTPS (port 443).Observe the results of your port scanning attempt, which may include a list of open ports on each IP address that was scanned.
Conclusion
In this tutorial, we covered the steps to create a basic port scanner using the Nvidia Jetson Nano on Ubuntu. By following these steps, you should be able to use your new tool to scan for open ports on remote computers or devices, potentially allowing you to identify potential security vulnerabilities or other interesting patterns of behavior.
2.3.9 - My Custom Nvidia Jeson Nano AI project
List of dependencies i need for creatiing my project.
Material i used
- Jetson Nano Developer Kit 4GB
- Wall power supply
- Samsung Class 10 MicroSD 32GB
- 120GB SSD
- Sata to USB 3 cable
- Noctua NF-A4x20-PWM
- Xbox Kinect v1
Before Begin
nano: Save and close Nano withCtrl+Xand thenYthenEnter
Download jetson nano
- Download the Jetson Nano Developer Kit SD Card Image, and note where it was saved on the computer.
- Write the image to your microSD card with Etcher.
Install Ubuntu
- Select
I accept the terms of the licensesand continue - Select a language
- Select keyboard layout
- Select time zone
- Choose
computer name,username,create passwordand then keep theRequire my password to login - Select the max size of the usb as the MicroSD is temporary use
- Select the
MAXN - (Default)and click continue to start install - After install login with new created account as steps above
- After first login it will pop a annoying
Keyboard Shortcutswindow…. Close this - And close the other welcome window…
Updating Your Nvidia Jetson Nano
Keep your Nvidia Jetson Nano up-to-date by following these simple steps.
Update Package Lists
- Open a terminal window.
- Run the following command to update the package lists:
sudo apt update
Upgrade Packages
- Continue in the terminal.
- Upgrade the installed packages to their latest versions:
sudo apt upgrade -y - After the upgrade is complete, reboot your device:
sudo reboot now
Clean Up
- Once your device is back online and you’ve logged in, open the terminal again.
- Clean up unnecessary packages and free up space:
sudo apt autoremove -y && sudo apt clean
Extra: Passwordless Sudo
For added convenience, you can configure your user account to use sudo without entering a password.
- Install the
nanotext editor if not already installed:sudo apt install nano - Open the sudoers file using the
visudocommand:sudo visudo - Add the following line, replacing
your_usernamewith your actual username:your_username ALL=(ALL) NOPASSWD:ALL - Save and exit
nanoby pressingCtrl+X, confirming withY, and then pressingEnter.
Wipe SSD and Moving MicroSD to SSD
Mount the SSD in your Jetson Nano
Open
DisksSelect the SSD Disk and Press
Ctrl+FErase:Don't overwrite existing data (Quick)orOverwrite existing data with zeroes (slow)Partitioning:Compatitble with modern systems and hard disks > 2TB (GPT)
Click
Format...Again click on
Formatand wait….. Depends on what u selected (Quick) or (Slow)Now Click on the
+Create PatrtitionI have set the Partition size to 110GB for SWAP (We will use this later this page)
Click Next
Volume Name: Create oneType:Internal disk for use with Linux systems only (Ext4)
Click on
CreateFinnaly mount the SSD
After the SSD is mounted open
Terminalagain as we neednanofor later use.sudo apt install nanoNow we download the repository
bootFromUSBfrom JetsonHacksgit clone https://github.com/jetsonhacks/bootFromUSBEnter the bootFromUSB folder
cd bootFromUSBWe need to have the SSD UUID so
./partUUID.shThis will output ssomething like this
PARTUUID of Partition: /dev/sda1
a40b6c71-ca35-79d3-8an0-d6v66749e060

Sample snippet for /boot/extlinux/extlinux.conf entry:
APPEND ${cbootargs} root=PARTUUID=a40b6c71-ca35-79d3-8an0-d6v66749e060 rootwait rootfstype=ext4
We only need to remember this part
root=PARTUUID=a40b6c71-ca35-79d3-8an0-d6v66749e060Now let’s move the files from MicroSD to SSD
./copyRootToUSB.sh -p /dev/sda1Now we need to change one part in our SSD
cd /mediaWhen we use the command
lswill see a our current user for me is itsysloginelssyslogineSo we enter the folder
cd syslogineagain when we do the
lscommand we can see our new created SSD for me it ismyprojectlsmyprojectSo we enter the folder
cd myprojectAfter were in the right SSD folder go to
cd boot/extlinuxedit
extlinux.confsudo nano extlinux.confReplace
root=/dev/mmcblk0p1with your SSD one, the one we early noted some where or still have that terminal open
root=PARTUUID=a40b6c71-ca35-79d3-8an0-d6v66749e060Finnaly… Lets shutdown Jetson Nano
sudo poweroffAfter your Jetson Nano is powered off remove the MicroSD card and power on the device again now it should be powering up with the SSD instead of the MicroSD
you can also just watch this video from JetonHacks
Install Jetson stats
- Install
pip3because this is not installed by defaultsudo apt-get install python3-pip -y - Now we can install jetson stats with the
pip3sudo -H pip3 install -U jetson-stats - best way is to restart your jetson nano
sudo reboot now - After restart and logged in run jetson stats
jtop
Make fan start at boot
We need to make the fan start at boot because why not…..This will help to cool your jetson nano allot with compiling and installing packages we need.
Now we will edit
rc.localwith nanosudo nano /etc/rc.localThen add this to the
rc.localfile#!/bin/bash sleep 10 sudo /usr/bin/jetson_clocks sudo sh -c 'echo 255 > /sys/devices/pwm-fan/target_pwm' exit 0Note
You can change the 255 to another value (0~255) to change the speed of fan.Then add execute permission to
rc.localfile.sudo chmod u+x /etc/rc.localAgain we reboot our jetson nano to see if this works
sudo reboot nowAfter 10 seconds when jetson nano is start the jetson clocks should start running
Installation of libusb
First install Deps
sudo apt install libudev-devLets create a fodler and enter it before be continue
mkdir project && cd projectGet the latest version of
libusbwget https://github.com/libusb/libusb/releases/download/v1.0.26/libusb-1.0.26.tar.bz2Now we need to extract it..
tar -xvjf libusb-1.0.26.tar.bz2And i love to work with folder with smaller names so rename it
mv libusb-1.0.26 libusbNow we enter the folder we renamed
cd libusbLet’s create the package or something.
./configure --prefix=/usr --disable-static && makeThats the install
sudo make installafter
make installwas succesful we can remove the .tar.bz2cd .. && rm libusb-1.0.26.tar.bz2
2.3.10 - Embark on a Machine Learning Odyssey with Nvidia Jetson Nano and Ubuntu
Requirements
- Nvidia Jetson Nano with Ubuntu installed
- CUDA-enabled GPU on the Jetson Nano
- Basic knowledge of Python programming
- A sense of curiosity and a dash of excitement
Setting the Stage
Our adventure begins with preparing the stage for machine learning brilliance. We’ll ensure that the Jetson Nano is equipped with the necessary tools to unleash the power of artificial intelligence.
1. Install Machine Learning Libraries
Let’s start by updating the package lists and installing essential machine learning libraries. Open a terminal on your Jetson Nano and run the following commands:
sudo apt update
sudo apt install -y python3 python3-pip
pip install numpy pandas scikit-learn tensorflow
These libraries will serve as our companions on this exhilarating journey.
2. Verify CUDA Installation
Take a moment to confirm that your Jetson Nano’s GPU is CUDA-enabled. Run the following command:
nvidia-smi
The presence of CUDA in the output signals that your GPU is ready to orchestrate the symphony of machine learning tasks.
Unleashing the Machine Learning Wizardry
With our stage set, let’s dive into the enchanting world of machine learning.
3. Create a Simple Machine Learning Script
Imagine a world where algorithms make predictions with uncanny accuracy. Create a file named ml_experiment.py to conjure a logistic regression model. Here’s a glimpse of the magic:
import numpy as np
from sklearn.model_selection import train_test_split
from sklearn.linear_model import LogisticRegression
from sklearn import metrics

# An enchanted dataset
X, y = np.random.rand(100, 5), np.random.randint(0, 2, 100)

# Split the dataset into training and testing sets
X_train, X_test, y_train, y_test = train_test_split(X, y, test_size=0.2, random_state=42)

# Create and train a logistic regression model
model = LogisticRegression()
model.fit(X_train, y_train)

# Make predictions on the test set
predictions = model.predict(X_test)

# Print the accuracy of the model
accuracy = metrics.accuracy_score(y_test, predictions)
print(f"Model Accuracy: {accuracy}")
Witness the model’s accuracy unfold before your eyes with the command:
python ml_experiment.py
4. Explore Advanced Topics
As our journey progresses, venture into the realms of advanced machine learning. Unearth the secrets of neural networks, delve into the wonders of deep learning, and unravel the mysteries of transfer learning. Use frameworks like TensorFlow to craft intricate models that defy the boundaries of imagination.
Culmination of the Odyssey
As our odyssey concludes, take a moment to reflect on the wonders you’ve encountered. The Nvidia Jetson Nano, coupled with the prowess of Ubuntu, has opened a gateway to the awe-inspiring universe of machine learning.
This tutorial provides a mere glimpse into the endless possibilities that await. The machine learning odyssey continues, and you are now equipped to embark on your own quests, creating intelligent systems and pushing the boundaries of what’s conceivable.
May your adventures in machine learning be filled with discovery, innovation, and the thrill of unlocking the potential of artificial intelligence on your Nvidia Jetson Nano.
2.3.11 - Experimenting with Steganography on Nvidia Jetson Nano using Ubuntu
Requirements
- Nvidia Jetson Nano with Ubuntu installed
- A high-resolution image file (JPEG or PNG) for steganography experiments
Step 1: Install Required Packages
Begin by updating the package lists and installing the necessary packages for steganography. Open a terminal on your Jetson Nano and run the following commands:
sudo apt update
sudo apt install -y steghide openjdk-8-jre
These commands ensure that the required steganography tools are installed on your system.
Step 2: Prepare Your Image
To perform steganography, you’ll need a cover image to hide your secret message. Download a high-resolution image and transfer it to your Jetson Nano’s file system. For this example, assume the image is named cover_image.jpg and is in the /home/user/steganography directory on the Jetson Nano.
scp cover_image.jpg user@192.168.0.105:/home/user/steganography/
Adjust the filename and directory according to your specific image details.
Step 3: Embed a Message
Now, you can use the steghide tool to embed a message within your cover image. Start by creating a text file containing the message you want to hide:
echo "This is a secret message." > secret_message.txt
Next, run the following command to embed the message within the cover image:
steghide --embed-filename secret_message.txt --cover-name cover_image.jpg --out steganography/output/stego_image.jpg
This command creates a new file called stego_image.jpg in the /home/user/steganography/output directory on your Jetson Nano, containing the embedded message.
Step 4: Extract the Message
To extract the hidden message from the stego image, use the following command:
steghide --extract -sf steganography/output/stego_image.jpg -xf secret_message.txt
This command creates a new file called secret_message.txt in the current directory on your Jetson Nano, containing the extracted message.
Conclusion
Congratulations! You’ve successfully experimented with steganography on your Nvidia Jetson Nano using Ubuntu. By following these steps, you can now embed and extract secret messages within image files. This opens up possibilities for exploring various applications of steganography in digital privacy, cryptography, and cybersecurity. Explore further to uncover the potential of hiding information in plain sight.
2.3.12 - Explore a World of Innovation with Nvidia Jetson Nano Projects
Featured Security and Hacking Projects:
- Unleash the power of the Jetson Nano to create a tool that tests password strength by trying various combinations of characters. Ideal for assessing the robustness of your own or others’ passwords.
- Utilize the Jetson Nano to capture and analyze network traffic on nearby wireless networks. Gain insights into data transmission over the air and explore potential security vulnerabilities.
- Empower the Jetson Nano to scan for open ports on remote computers or devices, identifying potential vulnerabilities exploitable by attackers.
Reverse Engineer an Executable File:
- Leverage the Jetson Nano’s potent GPU to disassemble and analyze binary executable files. Gain a deep understanding of software workings and identify potential security weaknesses.
Experiment with Steganography:
- Use the Jetson Nano to hide secret data within images, audio files, or other media using steganography techniques. An intriguing exploration of data hiding and cryptography.
- Transform the Jetson Nano into a tool that automatically navigates and downloads content from websites, ideal for data mining or archiving purposes.
Experiment with Machine Learning:
- Harness the Jetson Nano’s GPU for training machine learning models, from image recognition to speech synthesis and natural language processing.
Basic Network Intrusion Detection System:
- Utilize the Jetson Nano to analyze network traffic, detecting potential security threats or anomalies to enhance your computer or network’s security.
Reverse Engineer Wireless Protocols:
- Capture and analyze wireless signals like Bluetooth or Zigbee with the Jetson Nano, delving into the intricacies of how devices communicate wirelessly.
Experiment with Hardware Hacking:
- Interface the Jetson Nano’s GPIO pins with external hardware components such as sensors or actuators, a fantastic exploration of embedded systems design.
Build a GPS Tracker:
- Use the Jetson Nano to create a GPS tracking device, transmitting location data over the internet or other communication networks.
Develop a Password Generator:
- Create a tool with the Jetson Nano that generates strong, random passwords based on user-defined criteria.
Experiment with Wireless Signal Jamming:
- Develop a device with the Jetson Nano that transmits noise signals on specific frequencies, disrupting or interfering with wireless communication channels.
Reverse Engineer RFID Systems:
- Capture and analyze RFID signals with the Jetson Nano to understand and potentially exploit systems used for contactless payment cards or access control.
Experiment with Hardware Cloning:
- Use the Jetson Nano’s GPIO pins to interface with external hardware components, attempting to duplicate their functionality by emulating their behavior in software.
Create a Digital Forensics Tool:
- Utilize the Jetson Nano to analyze and recover data from storage devices such as hard drives, USB drives, or memory cards that have been formatted or erased.
Develop a Voice Changer:
- Leverage the Jetson Nano’s powerful GPU to process audio signals in real-time, allowing you to alter the pitch and timbre of your voice or other sound sources.
Create a Cryptography Tool:
- Implement classic encryption algorithms such as Caesar, Vigenere, or RSA with the Jetson Nano, enabling you to encode and decode messages with varying levels of security.
Beyond Security: Explore AI, Robotics, and More!
Real-time Object Recognition System:
- Utilize the Jetson Nano’s GPU for real-time object recognition, allowing it to identify and classify objects in a live camera feed.
Facial Recognition Door Access System:
- Create a secure access system using facial recognition technology, powered by the Jetson Nano.
Gesture Recognition for Human-Computer Interaction:
- Develop a system with the Jetson Nano that recognizes hand gestures, translating them into commands for innovative control interfaces.
Smart Mirror:
- Transform an ordinary mirror into a smart display using the Jetson Nano. Display weather information, calendar events, and personalized data on the mirror’s surface.
AI-powered Chatbot for Natural Language Processing:
- Leverage the Jetson Nano’s capabilities to implement a chatbot that understands and responds to natural language.
Autonomous Robot with Object Avoidance:
- Build a small robot powered by the Jetson Nano, capable of autonomous navigation with object avoidance.
Neural Style Transfer for Image Enhancement:
- Explore neural style transfer techniques on the Jetson Nano to apply artistic styles to images or videos.
Voice-controlled Home Automation System:
- Develop a voice-controlled system for home automation with the Jetson Nano, allowing you to command lights, appliances, and other smart devices.
Lane Departure Warning System for Cars:
- Utilize the Jetson Nano’s processing power to create a system that warns drivers of lane departure using video feeds from a car’s dashboard camera.
Digital Art Generator:
- Develop a system that generates unique digital art using generative adversarial networks (GANs) on the Jetson Nano.
Smart Plant Monitoring System:
- Create a system with the Jetson Nano to monitor and analyze plant health, capturing images of plants and providing insights into their well-being.
Experiment with Augmented Reality (AR):
- Explore AR applications using the Jetson Nano, overlaying digital information or 3D objects onto the real world in real-time.
Embark on an exciting journey of exploration and innovation with these Nvidia Jetson Nano projects. Whether you’re a novice or seasoned developer, there’s something here to spark your curiosity and creativity!
2.3.13 - Getting Started with Jetson Nano Developer Kit
Introduction
The NVIDIA® Jetson Nano™ Developer Kit is a small AI computer for makers, learners, and developers. After following along with this brief guide, you’ll be ready to start building practical AI applications, cool AI robots, and more.
- microSD card slot for main storage
- 40-pin expansion header
- Micro-USB port for 5V power input, or for Device Mode
- Gigabit Ethernet port
- USB 3.0 ports (x4)
- HDMI output port
- DisplayPort connector
- DC Barrel jack for 5V power input
- MIPI CSI-2 camera connectors
Included in the Box
Your Jetson Nano Developer Kit box includes:
- NVIDIA Jetson module and reference carrier board
- Small paper card with quick start and support information
- Folded paper stand
Items not Included
You’ll also need:
- microSD card (32GB UHS-1 minimum recommended)
- USB keyboard and mouse
- Computer display (HDMI or DP)
- Micro-USB power supply
Prepare for Setup
Items for Getting Started
microSD Card
The Jetson Nano Developer Kit uses a microSD card as a boot device and for main storage. It’s important to have a card that’s fast and large enough for your projects; the minimum recommended is a 32 GB UHS-1 card.
See the instructions below to flash your microSD card with operating system and software.
Micro-USB Power Supply
You’ll need to power the developer kit with a good quality power supply that can deliver 5V⎓2A at the developer kit’s Micro-USB port. Not every power supply promising “5V⎓2A” will actually do this.
As an example of a good power supply, NVIDIA has validated Adafruit’s 5V 2.5A Switching Power Supply with 20AWG MicroUSB Cable (GEO151UB-6025). It was specifically designed to overcome common problems with USB power supplies; see the linked product page for details.
Note: The stated power output capability of a USB power supply can be seen on its label.
Actual power delivery capabilities of USB power supplies do vary. Please see the Jetson Nano Developer Kit User Guide for additional information.
Write Image to the microSD Card
To prepare your microSD card, you’ll need a computer with Internet connection and the ability to read and write SD cards, either via a built-in SD card slot or adapter.
- Download the Jetson Nano Developer Kit SD Card Image, and note where it was saved on the computer.
- Write the image to your microSD card by following the instructions below according to your computer’s operating system: Windows, macOS, or Linux.
Instructions for Windows
Format your microSD card using SD Memory Card Formatter from the SD Association.
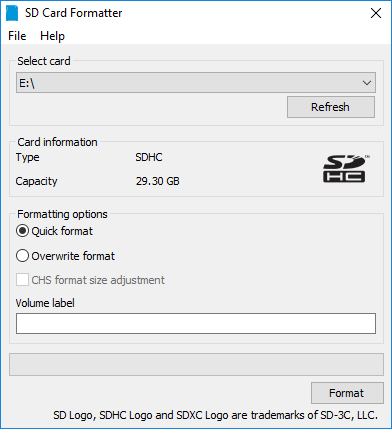
- Download, install, and launch SD Memory Card Formatter for Windows.
- Select card drive
- Select “Quick format”
- Leave “Volume label” blank
- Click “Format” to start formatting, and “Yes” on the warning dialog
Use Etcher to write the Jetson Nano Developer Kit SD Card Image to your microSD card
Download, install, and launch Etcher
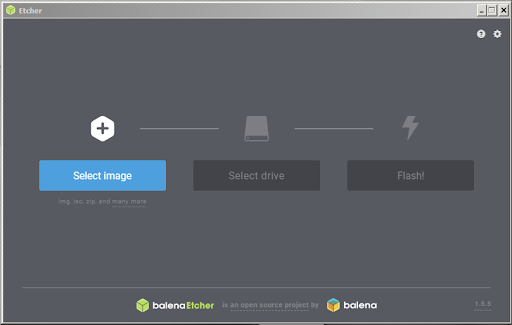
Click “Select image” and choose the zipped image file downloaded earlier.
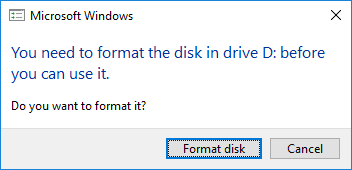
Insert your microSD card if not already inserted. Click Cancel (per this explanation) if Windows prompts you with a dialog like this:
Click “Select drive” and choose the correct device.
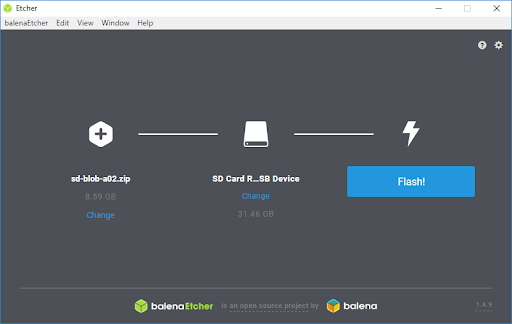
Click “Flash!” It will take Etcher about 10 minutes to write and validate the image if your microSD card is connected via USB3.
After Etcher finishes, Windows may let you know it doesn’t know how to read the SD Card. Just click Cancel and remove the microSD card.
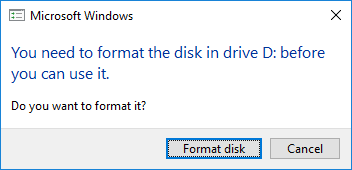
After your microSD card is ready, proceed to set up your developer kit.
Instructions for Mac OS
You can either write the SD card image using a graphical program like Etcher, or via command line.
Etcher Instructions
Do not insert your microSD card yet.
Download, install, and launch Etcher.
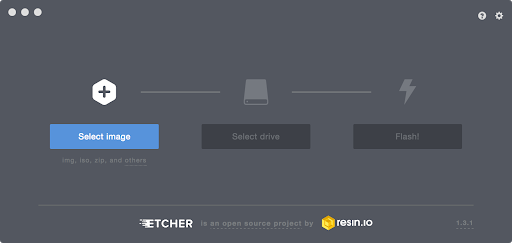
Click “Select image” and choose the zipped image file downloaded earlier.
Insert your microSD card. Click Ignore if your Mac shows this window:
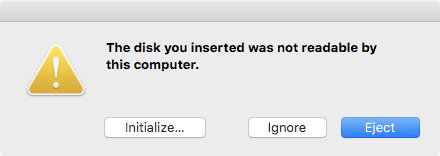
If you have no other external drives attached, Etcher will automatically select the microSD card as target device. Otherwise, click “Select drive” and choose the correct device.
Click “Flash!” Your Mac may prompt for your username and password before it allows Etcher to proceed
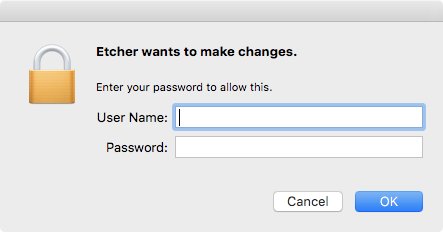 It will take Etcher about 10 minutes to write and validate the image if your microSD card is connected via USB3.
After Etcher finishes, your Mac may let you know it doesn’t know how to read the SD Card. Just click Eject and remove the microSD card.

Command Line Instructions
Do not insert your microSD card yet. Waiting will help you discover correct disk device name in steps below.
Open the Terminal app:
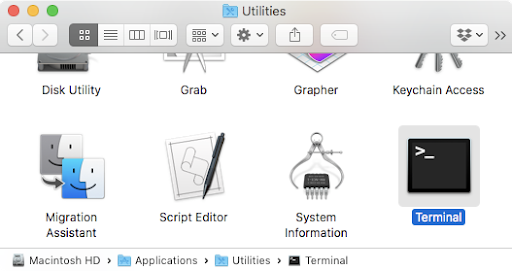
Use this command to list any external disk devices already attached to your Mac:
diskutil list external | fgrep '/dev/disk'For example, if you already have a USB drive attached to your Mac, the result will look similar to this:

Insert your microSD card. Click Ignore if your Mac shows this window:

Use the same command as before to list external disk devices. The newly listed disk device is the microSD card (/dev/disk2 in this example):

Use this command to remove any existing partitions from the microSD card, ensuring MacOS will let you write to it. BE VERY CAREFUL to specify the correct disk device.
sudo diskutil partitionDisk /dev/disk<n> 1 GPT "Free Space" "%noformat%" 100%For example:
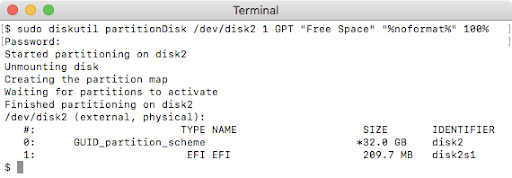
Use this command to write the zipped SD card image to the microSD card. Note the use of /dev/rdisk instead of /dev/disk:
/usr/bin/unzip -p ~/Downloads/jetson_nano_devkit_sd_card.zip | sudo /bin/dd of=/dev/rdisk<n> bs=1mFor example:

There will be no indication of progress (unless you signal with CTRL-t). When the dd command finishes, your Mac will let you know it cannot read the microSD card. Just click Eject:

After your microSD card is ready, proceed to set up your developer kit.
Instructions for Linux
You can either write the SD card image using a graphical program like Etcher, or via command line.
Etcher Instructions
Download, install, and launch Etcher.
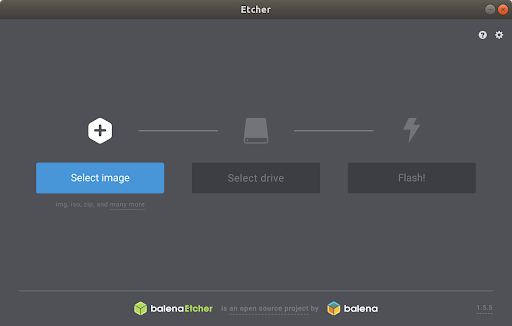
Click “Select image” and choose the zipped image file downloaded earlier.
Insert your microSD card. If you have no other external drives attached, Etcher will automatically select the microSD card as target device. Otherwise, click “Change” and choose the correct device.
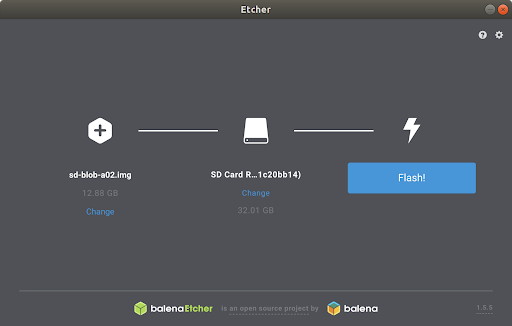
Click “Flash!” Your OS may prompt for your username and password before it allows Etcher to proceed.
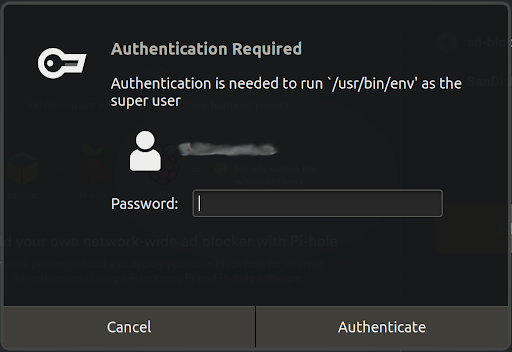
It will take Etcher 10-15 minutes to write and validate the image if your microSD card is connected via USB3.After Etcher finishes, eject the SD Card using Files application:
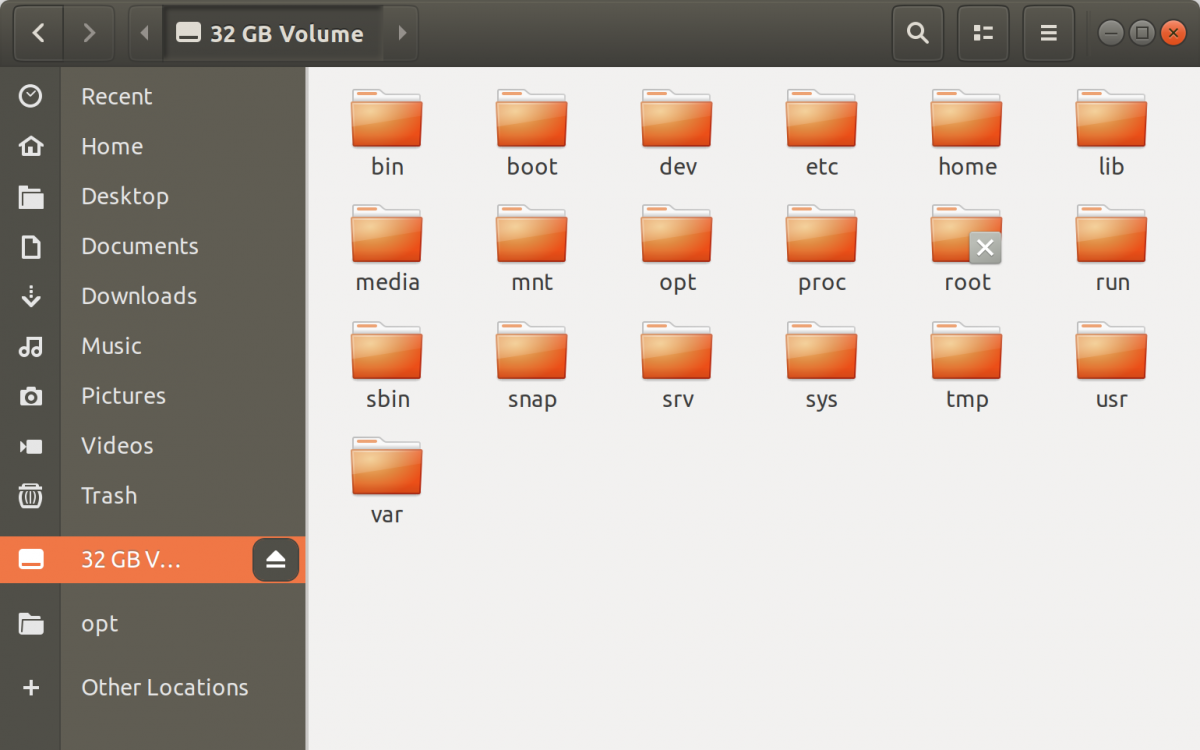
Physically remove microSD card from the computer.
Command Line Instructions
Open the Terminal application by pressing
Ctrl+Alt+t.Insert your microSD card, then use a command like this to show which disk device was assigned to it:
dmesg | tail | awk '$3 == "sd" {print}'In this example, we can see the 16GB microSD card was assigned /dev/sda:

Use this command to write the zipped SD card image to the microSD card:
/usr/bin/unzip -p ~/Downloads/jetson_nano_devkit_sd_card.zip | sudo /bin/dd of=/dev/sd<x> bs=1M status=progressFor example:

When the dd command finishes, eject the disk device from the command line:
sudo eject /dev/sd<x>Physically remove microSD card from the computer.
After your microSD card is ready, proceed to Setup your developer kit.
Setup and First Boot
Initial Setup with Display Attached
Initial Setup in Headless Mode
Next Steps
Find Your Way Around
Projects and Learning
Troubleshooting
Power
Display
2.3.14 - new2
The error ModuleNotFoundError: No module named 'cv2' indicates that the OpenCV library (cv2) is not installed on your system. To resolve this issue, you need to install OpenCV. Below are the steps you can follow to install OpenCV:
Install OpenCV on Nvidia Jetson Nano
Step 1: Update Package Lists and Install Dependencies
Open a terminal and run the following commands to update the package lists and install necessary dependencies:
sudo apt update
sudo apt install -y libopencv-dev python3-opencv
Step 2: Check OpenCV Version
You can check the installed OpenCV version using the following Python command:
python3 -c "import cv2; print(cv2.__version__)"
This command should print the installed OpenCV version. If it doesn’t print any errors, then OpenCV is successfully installed.
Step 3: Test OpenCV Installation
Create a simple Python script (e.g., test_opencv.py) and add the following code to test if OpenCV is working:
import cv2

# Read an image from file
image = cv2.imread('path_to_your_image.jpg')

# Display the image
cv2.imshow('Image', image)
cv2.waitKey(0)
cv2.destroyAllWindows()
Replace 'path_to_your_image.jpg' with the path to an image file on your system.
Save the file and run it:
python3 test_opencv.py
If OpenCV is installed correctly, it should display the image using OpenCV functions.
Additional Note:
If you are using virtual environments, make sure your virtual environment is activated when installing OpenCV and running your Python script.
If you encounter any issues or have specific requirements, feel free to provide more details, and I’ll assist you further.
2.3.15 - Upgrade OpenCV to Version 4.6 on Nvidia Jetson Nano
By default, the Nvidia Jetson Nano comes with OpenCV 4.1.x pre-installed. This guide will help you upgrade to OpenCV 4.6 for the latest features and improvements.
Step 1: Preparing the System
1. Start with a Fresh Update
sudo apt update
sudo apt upgrade
Ensures your system is up-to-date.
2. Install Nano and dphys-swapfile
sudo apt install nano
sudo apt install dphys-swapfile -y
Installs the Nano text editor and the swap file manager.
3. Enlarge Swap Boundary
sudo nano /sbin/dphys-swapfile
Find CONF_MAXSWAP=2048 and replace it with CONF_MAXSWAP=6144. Save the changes.
4. Set Swap Size
sudo nano /etc/dphys-swapfile
Find #CONF_SWAPSIZE= and replace it with CONF_SWAPSIZE=6144. Save the changes.
5. Reboot System
sudo reboot
Reboots the system to apply changes.
Step 2: OpenCV 4.6 Installation
1. Check Available Memory
free -m
Ensures you have a total of at least 8.5 GB available.
2. Download and Install OpenCV 4.6 Script
wget https://github.com/Qengineering/Install-OpenCV-Jetson-Nano/raw/main/OpenCV-4-6-0.sh
sudo chmod 755 ./OpenCV-4-6-0.sh
./OpenCV-4-6-0.sh
Downloads and runs the script for OpenCV 4.6 installation.
3. Post-Installation Cleanup
rm OpenCV-4-6-0.sh
sudo /etc/init.d/dphys-swapfile stop
sudo apt remove --purge dphys-swapfile
Cleans up installation files and removes the dphys-swapfile.
4. Additional Tips
sudo rm -rf ~/opencv
sudo rm -rf ~/opencv_contrib
Saves an additional 275 MB by removing unnecessary files.
5. Reboot System
sudo reboot now
Ensures all changes take effect.
Extra: Install Qt5 (Optional)
Only install if you want Qt5 to beautify your OpenCV GUI.
sudo apt-get install qt5-default
2.3.16 - Nvidia Jetson Nano Post-Installation Guide
1. Update System Software
Ensure your system has the latest updates and security patches.
sudo apt update
sudo apt upgrade
2. Configure Memory Swap
Adjust the swap size for better performance.
sudo nano /etc/dphys-swapfile
Change CONF_SWAPSIZE to your desired value (e.g., 2048).
sudo /etc/init.d/dphys-swapfile stop
sudo /etc/init.d/dphys-swapfile start
3. Install Development Tools
Install essential development tools for coding and compiling.
sudo apt install build-essential cmake
4. Install Useful Packages
Install packages that enhance the functionality of your Jetson Nano.
sudo apt install vim htop git curl wget
5. Setup Remote Access
Set up SSH for remote access to your Jetson Nano.
sudo apt install openssh-server
Find your Jetson Nano’s IP address:
hostname -I
Connect via SSH:
ssh <your_username>@<your_jetson_ip_address>
6. Optimize for Deep Learning (Optional)
If you plan to use your Jetson Nano for deep learning, consider installing frameworks like TensorFlow, PyTorch, or other deep learning libraries.
For example, to install TensorFlow:
sudo apt install libhdf5-serial-dev hdf5-tools
sudo apt install python3-pip
sudo pip3 install --pre --extra-index-url https://developer.download.nvidia.com/compute/redist/jp/v46 tensorflow
7. Explore Jetson GPIO Library
If you’re working with GPIO pins, explore the Jetson GPIO library.
sudo pip3 install Jetson.GPIO
Check out the Jetson GPIO library documentation for usage.
Conclusion
Your Nvidia Jetson Nano is now set up and ready for your projects! Explore the vast possibilities of AI, robotics, and more with your powerful device.
Feel free to customize your environment based on your specific needs and project requirements.
2.3.17 - Reverse Engineering an Executable File on Nvidia Jetson Nano using IDA Pro
Requirements
- Nvidia Jetson Nano with Ubuntu installed
- IDA Pro for Arm/Linux (version X.X recommended, download link)
- The ARM/Linux executable file you want to reverse engineer, transferred to the Jetson Nano’s file system
Steps
1. Connect and Transfer
- Connect your Jetson Nano to a computer using an SSH or USB connection.
- Transfer the ARM/Linux executable file you want to reverse engineer to the Jetson Nano’s file system. You can use tools like
scporrsyncfor this purpose. Example:scp path/to/your/file user@192.168.0.105:/path/on/jetson
2. Launch IDA Pro
- Open a terminal on your computer and navigate to the directory where you installed IDA Pro.
- Run the following command to launch IDA Pro in debugging mode, targeting your Nvidia Jetson Nano:Replace
idaq -t 192.168.0.105192.168.0.105with the IP address of your Nvidia Jetson Nano.
3. Load and Analyze
- Once IDA Pro is launched, click on “File” in the menu bar and select “Load program file”.
- Browse to the location of the executable file on the Jetson Nano’s file system and open it.
- IDA Pro will now analyze the binary code of the executable file and display its disassembled code.
4. Navigate and Analyze
- Navigate through the code using the various tools provided by IDA Pro, such as the decompiler window, the debugger window, or the graph view.
- Pay attention to any suspicious or unusual patterns that may indicate potential security vulnerabilities. For example, look for function calls that do not seem necessary for the program’s intended functionality or check for buffer overflows or other memory-related issues.
5. Save and Conclude
- Once you have completed your analysis, save the IDA Pro project file (with a
.idbextension) for future reference.
Conclusion
In this tutorial, we covered the steps to reverse engineer an ARM/Linux executable file on your Nvidia Jetson Nano using IDA Pro. By following these steps and leveraging key features of IDA Pro, you should be able to analyze the binary code effectively, potentially identifying security vulnerabilities or other interesting patterns of behavior.
Note: Ensure that you use IDA Pro and engage in reverse engineering activities ethically and within legal boundaries. Respect software licenses and applicable laws.
2.3.18 - How To Set Up SSD on Nvidia Jetson Nano
Prerequisites
- Nvidia Jetson Nano
- SSD
- MicroSD card
- Terminal access
Steps
1. Wipe SSD Using Terminal
- Connect the SSD to your Jetson Nano.
- Open a terminal.
- Use the
fdiskcommand to manage partitions:sudo fdisk /dev/sda - Delete existing partitions by typing
dand follow the on-screen prompts. - Create a new partition by typing
nand follow the prompts. ChoosePrimaryand use the default values. - Set the partition type to Linux (
83) by typingtand choosing83. - Write the changes and exit by typing
w.
2. Format and Mount the SSD
- Format the SSD partition with the Ext4 file system:
sudo mkfs.ext4 /dev/sda1 - Create a mount point:
sudo mkdir /media/ssd - Mount the SSD:
sudo mount /dev/sda1 /media/ssd - Confirm that the SSD is mounted:
df -h - Make the SSD mount automatically on boot by adding an entry to
/etc/fstab:echo '/dev/sda1 /media/ssd ext4 defaults 0 0' | sudo tee -a /etc/fstab - Check the entry in
/etc/fstab:cat /etc/fstab
3. Additional Configuration (Optional)
- If you want to set up a SWAP partition (optional), you can create and enable it using the following commands:
sudo fallocate -l 4G /media/ssd/swapfile sudo chmod 600 /media/ssd/swapfile sudo mkswap /media/ssd/swapfile sudo swapon /media/ssd/swapfile - To make the SWAP file permanent, add an entry to
/etc/fstab:echo '/media/ssd/swapfile none swap sw 0 0' | sudo tee -a /etc/fstab
Conclusion
You have successfully wiped, formatted, and mounted your SSD using the terminal on your Nvidia Jetson Nano.
2. Download and Move Files
- After the SSD is mounted, open
Terminalto installnano:sudo apt install nano - Download the
bootFromUSBrepository from JetsonHacks:git clone https://github.com/jetsonhacks/bootFromUSB - Enter the
bootFromUSBfolder:cd bootFromUSB - Obtain the SSD UUID:Remember the output:
./partUUID.shroot=PARTUUID=a40b6c71-ca35-79d3-8an0-d6v66749e060. - Move files from MicroSD to SSD:
./copyRootToUSB.sh -p /dev/sda1
3. Configure SSD
- Navigate to the SSD folders:
cd /media/syslogine/myproject/boot/extlinux - Open
extlinux.conf:sudo nano extlinux.conf - Replace:
with the SSD UUID obtained earlier:root=/dev/mmcblk0p1root=PARTUUID=a40b6c71-ca35-79d3-8an0-d6v66749e060 - Save and exit
nano(Ctrl+X,Y,Enter). - Shutdown Jetson Nano:
sudo poweroff - After your Jetson Nano powers off, remove the MicroSD card and power it on again. The system should now boot from the SSD instead of the MicroSD card.
Conclusion
Congratulations! You have successfully set up your SSD on Nvidia Jetson Nano, enhancing storage and performance.
2.3.19 - Building a Simple Web Crawler on Nvidia Jetson Nano using Ubuntu
Requirements
- Nvidia Jetson Nano with Ubuntu installed
- Basic knowledge of Python programming
Steps
Install Required Packages:
Start by updating the package lists and installing the necessary packages for web crawling:
sudo apt update
sudo apt install -y python3 python3-pip
Set Up a Python Virtual Environment:
Create a virtual environment to manage dependencies for your web crawler:
python3 -m venv crawler_env
source crawler_env/bin/activate
Install BeautifulSoup and Requests:
Install the Python packages BeautifulSoup and Requests for web scraping:
pip install beautifulsoup4 requestsCreate the Web Crawler Script:
Write a simple Python script to perform web crawling. You can use a text editor or an integrated development environment (IDE) to create a file named
web_crawler.py:import requests from bs4 import BeautifulSoup def simple_web_crawler(url): # Make a GET request to the specified URL response = requests.get(url) # Parse the HTML content of the page soup = BeautifulSoup(response.text, 'html.parser') # Extract and print links from the page links = soup.find_all('a') for link in links: print(link.get('href')) # Example usage if __name__ == "__main__": target_url = "https://example.com" simple_web_crawler(target_url)Run the Web Crawler:
Execute the web crawler script to see it in action:
python web_crawler.pyThe script will fetch the HTML content of the specified URL and print the links found on the page.
Customize and Extend:
Feel free to customize the script based on your needs. You can explore more advanced features such as handling different types of content, implementing crawling depth, or storing extracted data.
Conclusion
Congratulations! You’ve successfully built a simple web crawler on your Nvidia Jetson Nano using Ubuntu. This tutorial provides a foundation for understanding web scraping concepts, and you can further enhance and customize your web crawler for specific applications or projects.
2.3.20 - Simple Wi-Fi Sniffer with Nvidia Jetson Nano on Ubuntu
Requirements
- Nvidia Jetson Nano with Ubuntu installed
- A Wi-Fi adapter compatible with monitor mode (e.g., Alfa AWUS036NH or any other compatible adapter)
Steps
Connect your Jetson Nano to a power source and insert an SD card with Ubuntu installed.
Power on the device and connect it to a monitor, keyboard, and mouse.
Open a terminal window by clicking on the top-left corner of the screen and selecting “Terminal”.
Update the package lists by running the following command:
sudo apt updateInstall the
aircrack-ngsuite of wireless security tools by running the following command:sudo apt install aircrack-ngConnect your Wi-Fi adapter to one of the USB ports on your Jetson Nano and power it on.
Check if your Wi-Fi adapter is recognized by the system by running the following command (ensure your adapter supports monitor mode):
ls /sys/class/net/You should see an output similar to this:
eth0 wlan0If you do not see
wlan0in the list of network interfaces, it may be because your Wi-Fi adapter is not compatible with monitor mode. In that case, you will need to use a different Wi-Fi adapter or follow alternative steps to enable monitor mode on your specific adapter.Bring up the
wlan0interface by running the following command:sudo ip link set wlan0 upPut the
wlan0interface into monitor mode by running the following command:sudo iw phy wlan0 interface add mon0 type monitor sudo ip link set mon0 upRun a packet capture utility such as
tsharkto capture network traffic on the nearby wireless networks, and save the output to a file:tshark -i mon0 -f "wlan" -w wifi_capture.pcapngObserve the captured network traffic in real-time by running the following command in another terminal window:
tcpdump -r wifi_capture.pcapngAfter you have collected enough network traffic data, stop the packet capture utility by pressing
Ctrl+C.Analyze the captured network traffic using tools such as Wireshark or
aircrack-ngto identify potential security vulnerabilities or other interesting patterns of behavior.
Conclusion
In this tutorial, we covered the steps to create a simple Wi-Fi sniffer using the Nvidia Jetson Nano on Ubuntu. By following these steps, you should be able to use your new tool to capture and analyze network traffic on nearby wireless networks, potentially allowing you to identify potential security vulnerabilities or other interesting patterns of behavior.
2.3.21 - TensorFlow 2.4 Installation on Nvidia Jetson Nano
Python API Installation
1. Update and Upgrade System Packages
sudo apt update
sudo apt upgrade
Ensures your system is up-to-date.
2. Install pip and pip3
sudo apt install python-pip python3-pip
Installs pip for Python 2 and Python 3.
3. Uninstall and Reinstall Numpy
sudo -H pip3 uninstall numpy && sudo -H pip3 install numpy==1.18.5
Ensures the correct version of Numpy is installed.
4. Remove Old TensorFlow Versions
sudo pip uninstall tensorflow && sudo pip3 uninstall tensorflow
Removes any existing TensorFlow installations.
5. Install Dependencies
sudo apt install gfortran -y &&\
sudo apt install libhdf5-dev libc-ares-dev libeigen3-dev -y &&\
sudo apt install libatlas-base-dev libopenblas-dev libblas-dev -y &&\
sudo apt install liblapack-dev -y &&\
sudo -H pip3 install Cython==0.29.21
Installs necessary dependencies.
6. Install H5py with Specific Cython Version
sudo -H pip3 install h5py==2.10.0
sudo -H pip3 install -U testresources numpy
Installs H5py with specific Cython version.
7. Upgrade Setuptools and Install Additional Packages
sudo -H pip3 install --upgrade setuptools
sudo -H pip3 install pybind11 protobuf google-pasta
sudo -H pip3 install -U six mock wheel requests gast
sudo -H pip3 install keras_applications --no-deps
sudo -H pip3 install keras_preprocessing --no-deps
Upgrades setuptools and installs additional packages.
8. Install gdown to Download from Google Drive
sudo -H pip3 install gdown
Installs gdown.
9. Download TensorFlow Wheel
gdown https://drive.google.com/uc?id=1DLk4Tjs8Mjg919NkDnYg02zEnbbCAzOz
Downloads TensorFlow wheel from Google Drive.
10. Install TensorFlow
sudo -H pip3 install tensorflow-2.4.1-cp36-cp36m-linux_aarch64.whl
Installs TensorFlow.
TensorFlow 2.4 C++ API Installation
1. Update and Upgrade System Packages
sudo apt update
sudo apt upgrade
Ensures your system is up-to-date.
2. Remove Old TensorFlow Versions
sudo rm -r /usr/local/lib/libtensorflow*
sudo rm -r /usr/local/include/tensorflow
Removes any existing TensorFlow installations.
3. Install Dependencies
sudo apt install wget curl libhdf5-dev libc-ares-dev libeigen3-dev
sudo apt install libatlas-base-dev zip unzip
Installs necessary dependencies.
4. Install gdown to Download from Google Drive
pip install gdown
Installs gdown.
5. Download TensorFlow C++ API Tarball
gdown https://drive.google.com/uc?id=1zJ_EF2aFkr8JU8JgTLfKMxC6KxE3DRD4
Downloads TensorFlow C++ API tarball from Google Drive.
6. Unpack the Tarball
sudo tar -C /usr/local -xzf libtensorflow-2.4.1-JetsonNano.tar.gz
Unpacks the tarball.
Now your Nvidia Jetson Nano is equipped with TensorFlow 2.4, ready to empower your machine learning projects!
2.3.22 - Upgrade Python to Version 3.7 on Ubuntu
Version Check
Run the following command to check the current version of Python installed:
python3 --version
Output:
Python 3.6.9
Download and Install Python 3.7
Update the packages list:
sudo apt update
Install Python 3.7:
sudo apt-get install python3.7 -y
Add Python 3.6 & Python 3.7 to update-alternatives
Add Python 3.6 and Python 3.7 to the update-alternatives system:
sudo update-alternatives --install /usr/bin/python3 python3 /usr/bin/python3.6 1
sudo update-alternatives --install /usr/bin/python3 python3 /usr/bin/python3.7 2
Update Python 3 to Point to Python 3.7
Configure Python 3 to use Python 3.7:
sudo update-alternatives --config python3
Choose the selection number corresponding to Python 3.7.
Alternative: Update Python 3 to Point to Python 3.7
If you prefer a direct symlink update, run the following commands:
sudo rm /usr/bin/python3
sudo ln -s python3.7 /usr/bin/python3
Test the New Version of Python3
Check the new Python 3 version:
python3 -V
Output:
Python 3.7.5
Now you have successfully upgraded Python to version 3.7 on your Ubuntu system. This is particularly useful for accessing the latest features and improvements in Python 3.7.
2.3.23 - Xbox 360 v1 Camera
Setting up the Xbox 360 v1 Camera on Jetson Nano with Ubuntu
Overview
In this tutorial, we will cover the steps to set up the Xbox 360 v1 camera on a Nvidia Jetson Nano running Ubuntu. This camera can be used for various applications such as computer vision and machine learning.
Requirements
- Nvidia Jetson Nano with Ubuntu installed
- USB 2.0 cable (for connecting the Xbox 360 v1 camera to the Jetson Nano)
- Xbox 360 v1 camera
Steps
- Connect the Xbox 360 v1 camera to the Jetson Nano using a USB 2.0 cable.
- Open a terminal window on the Jetson Nano by clicking on the top-left corner of the screen and selecting “Terminal”.
- Update the package lists by running the following command:
sudo apt update - Install libuvc, which is required to communicate with the Xbox 360 v1 camera:
sudo apt install libuvc-dev - Reboot the Jetson Nano by running the following command:
sudo reboot - After the reboot, open a new terminal window and run the following command to verify that the Xbox 360 v1 camera is recognized by the system:
You should see an output similar to this:ls /dev/video*/dev/video0 - Run the following command to test the camera feed in VLC media player:
vlc v4l2:// :v4l-vbi-fmt=none :v4l-chroma=h264 :v4l-chroma-cap=0 :v4l-fps=30 :v4l-input=1 :v4l-std=pal :v4l-frequency=525 :live-caching=300 - If the camera feed is working correctly, you can proceed to develop your computer vision or machine learning applications using libraries like OpenCV.
Conclusion
In this tutorial, we covered the steps to set up the Xbox 360 v1 camera on a Nvidia Jetson Nano running Ubuntu. By following these steps, you should be able to use the camera for various applications such as computer vision and machine learning.
====
Download and Install Python 3.8 on Nvidia Jetson Nano
Install Dependencies
Before we begin, let’s make sure the system has the necessary tools and libraries. Open a terminal on your Nvidia Jetson Nano and run the following commands:
sudo apt update
sudo apt install -y build-essential libssl-dev libffi-dev python3.8-dev
sudo apt update: Updates the package lists on your system.sudo apt install -y build-essential libssl-dev libffi-dev python3.8-dev: Installs essential build tools and libraries required for Python compilation.
Download and Install Python 3.8
Now, let’s download and install Python 3.8. In the same terminal, execute the following commands:
wget https://www.python.org/ftp/python/3.8.12/Python-3.8.12.tgz
tar xvf Python-3.8.12.tgz
cd Python-3.8.12
./configure --enable-optimizations
make -j4
sudo make altinstall
wget https://www.python.org/ftp/python/3.8.12/Python-3.8.12.tgz: Downloads the Python 3.8 source code archive.tar xvf Python-3.8.12.tgz: Extracts the contents of the archive.cd Python-3.8.12: Navigates into the extracted directory../configure --enable-optimizations: Configures the Python build with optimizations.make -j4: Compiles Python. The-j4flag specifies the number of parallel processes (adjust as needed).sudo make altinstall: Installs Python with a version-specific executable (python3.8).
These commands download, configure, compile, and install Python 3.8 on your Nvidia Jetson Nano. This version is installed alongside the default Python versions and does not replace them.
Install Python 3.8 and Pip on Nvidia Jetson Nano
1. Download get-pip.py Script
Download the get-pip.py script using wget:
wget https://bootstrap.pypa.io/get-pip.py
2. Install Python 3.8 and Pip
Use the following command to install Python 3.8 and Pip:
python3 get-pip.py --prefix=/usr/local/python3.8
3. Update Bash Configuration
Open the .bashrc file for editing:
sudo nano ~/.bashrc
Add the following line to the bottom of the file:
export PATH="/usr/local/python3.8/bin:$PATH"
Save the file and apply the changes:
source ~/.bashrc
4. Verify Installation
Check the Python and Pip versions to ensure successful installation:
python3.8 --version
pip3.8 --version
These commands download and install Python 3.8 along with Pip on your Nvidia Jetson Nano. The .bashrc update ensures that the new Python version is available in your system’s PATH. Verify the installation by checking the versions of Python and Pip.
=====
- Download OpenCV: Download OpenCV from its official website (https://opencv.org/releases/) and install it using the following command:
sudo apt-get install libopencv-dev python-opencv - Download Numpy: Download Numpy from its official website (https://numpy.org/install/) and install it using pip:
pip install numpy - Download Pycuda: Download Pycuda from its official website (https://pypi.org/project/pycuda/) and install it using the following command:
sudo apt-get install python3-dev libcupti-dev libcupti-dev-common libnvvm-dev libnvvm3 libnvvm3-dev libnvvm3-bin libnvvm3-dev-common libnvvm3-bin-common libnvvm3-dev-doc libnvvm3-dev-doc-common cuda-nvcc cuda-command-line-tools-10-2 cuda-libraries-10-2 cuda-libraries-dev-10-2 - Download CUDA: Download CUDA from its official website (https://developer.nvidia.com/cuda-downloads) and install it using the following command:
sudo dpkg -i cuda-repo-ubuntu1804-10-2-local_10.2.89-1_amd64.deb
sudo apt-key adv --fetch-keys http://developer.download.nvidia.com/compute/cuda/repos/ubuntu1804/x86_64/7fa2af80.pub
sudo apt-get update
sudo apt-get install cuda
1
Clone the GitHub Repository: Use the following command to clone the repository:
git clone https://github.com/raymondlo84/nvidia-jetson-ai-monitorNavigate to the Cloned Directory: After cloning, use the
cdcommand to navigate to the directory.Install Dependencies: Use pip to install the necessary dependencies:
pip install -r requirements.txtRun the Script: To run the script, use the following command:
python main.pyConfigure the Script: The script has a configuration file named
config.py. You can modify this file to configure various aspects of the script such as the frequency at which the script checks for GPU usage, CPU temperature, and other metrics.Check the Output: Once you have run the script, it will start monitoring your NVIDIA Jetson Nano’s GPU usage, CPU temperature, and other metrics. The output can be viewed in the console or redirected to a file for later analysis.
3 - IoT Software Platforms
Node-RED Microsoft Azure IoT Amazon Web Services IoT Google Cloud IoT
4 - IoT Protocols and Standards
MQTT: mqtt MQTT basics MQTT brokers and clients CoAP: coap CoAP fundamentals CoAP in IoT applications Other protocols (HTTP, AMQP, DDS, etc.)
4.1 - MQTT
MQTT basics MQTT brokers and clients
4.2 - CoAP
CoAP fundamentals CoAP in IoT applications
5 - IoT Programming
Embedded programming for IoT Cloud programming for IoT IoT data processing and analytics
6 - IoT Security
IoT security challenges Secure device provisioning Encryption and authentication Over-the-air updates (OTA)
7 - IoT Connectivity and Networks
Wired networks for IoT (Ethernet, PoE) Wireless networks for IoT (Wi-Fi, Bluetooth, LoRa) Cellular networks for IoT (NB-IoT, LTE-M)
8 - IoT Data Management
IoT data collection and ingestion IoT data storage and databases IoT data visualization and dashboards
9 - IoT Edge Computing
Edge computing in IoT Edge analytics and processing Edge device management
10 - IoT Industry Applications
Smart homes and buildings Industrial IoT (IIoT) Healthcare IoT Agriculture IoT